
How do I edit user details and signatures with Signite?
You can manage you users from the Users screen, assigning them signature templates, adding them to Signite groups, and deploying them.
1. Assign a Template to a User
First, make sure you have an existing Template to assign to your users.
Follow this guide to create your templates:
https://www.signite.io/support/guides/how-do-i-edit-and-set-a-signature-template-with-signite/
Once that’s done, go to your Users screen and click the checkboxes for which of the users you wish to assign a template.
From the dropdown menu choose the template you wish to assign and click the Apply button next to it.

2. Edit the User’s Details
As a best practice, we suggest editing all user information on Google Workspace prior to synching the user into Signite.
However, you can manage the user’s information by choosing the user from the list or using the Edit button on the right side of the user’s line

Any changes made to the user’s information in the editing screen will overwrite the template’s information, unless stated otherwise.
Note that synchronizing your users from the Domains screen by using the Synchronize & Deploy All Data option will overwrite any changes you make in the user editing screen.
Click the Update User button for the changes to take effect.
You can also deploy or re-deploy the signature from here.

3. Deploy the Signature
Return to the Users screen, select the relevant users you wish to deploy, and click the Deploy Selected button
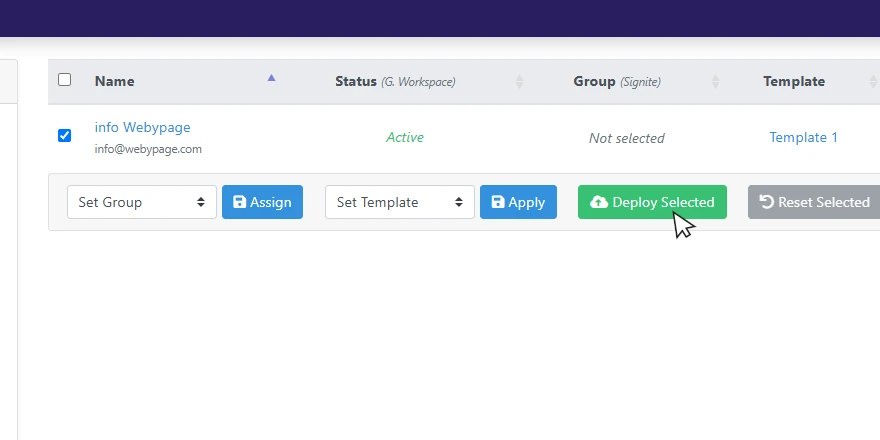
You can also click the Deploy button for each user individually.
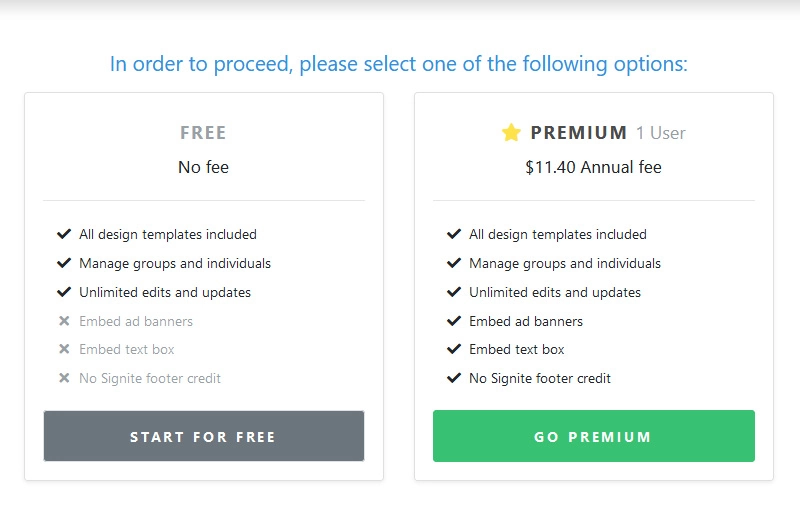
4. Select a Plan
If you haven’t selected a plan before, choose one now.
Follow this guide for more information on what each plan provides:
https://www.signite.io/support/guides/plans-and-upgrades/
After deployment, go to your inbox and refresh it to make sure the signature was deployed.
If you have any questions, please contact us at support@signite.io