
How do I edit and set a signature template with Signite?
To start editing your signature template, go to the Templates screen. If you’ve yet to create a template, the Create a new template window will open automatically.
If you have other templates already, click the blue New Template button to create a new one.
The template designer is sectioned into 4 categories by the type of fields it contains, as well as a preview screen to the right.
1. The General Tab
Here you can find the general and branding related information.
You can name the template from this tab, set colors, display language, and logo, and choose general settings related to the template itself, such as whether to show a top separating line or hide the user’s name.
2. The Contact Tab
Here you can find the company’s contact information, from its physical address to the website and email, as well as phones, appointment link and the option to add a user’s personal link (managed from the user’s editing screen).
Some of these fields can be overwritten by the information entered via the user editing screen, or synchronized from Google Workspace.
3. The Social Tab
Here you can find social media links which can be shown as graphic icons.
You can choose which colors they’ll be displayed as from the General tab.
Each social link can be overwritten for each user from the user’s editing screen.
4. The Footer Tab
Here you can find special modules shown under the signature by default.
You can set up banners (and schedule them), add a disclaimer using the Footer Text module, add custom links, attach an RSS feed, or show the latest YouTube video from your channel.
See the following guides for more information:
Banner management
RSS feed
YouTube feed
Handwritten Signature
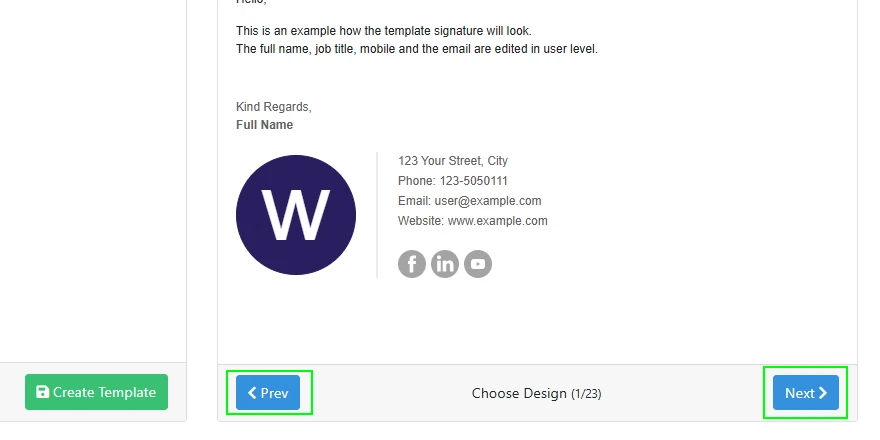
5. Template Preview
The template preview shows how the signature will appear before you deploy it to your users.
You can change the template style by choosing either the Next or Prev button surrounding the Choose Design section.
6. Premium Fields
Premium fields are indicated by a gold star above them.
Under a Free plan, you can preview the field in the template preview or the user preview screens, but they won’t show when you deploy the signature.
To deploy the field, choose a Premium package from the available list and re-deploy the signatures.
Follow this guide for more information about our plans: Plans and Upgrades
7. Assign the Template to Your Users
Once the template is created and saved, you can assign it to your users and deploy it.
See the following guide for how to assign a template to your users and edit their details: How do I edit user details and signatures with Signite?
If you have any questions, please contact us at support@signite.io